You have just spent the past four weekends digging the hole for a garden pond. The liner is in and the backyard pond is filled with water. Rocks have been placed carefully around the edge to give the pond a nice natural look. The pump is running and the small waterfall creates a pleasant trickling sound at one end of the pond. Now the fun really starts. It’s time to go out and buy a few of those gorgeous koi you have been eyeing in the magazines for so long. Bounding into the local aquarium store you excitedly inquire: “Do you have any really nice koi?”
“Some what?” retorts the guy behind the counter.
“You know, koi,” you repeat nervously. “Big Japanese pond fish.”
“Oh yeah, you mean pond comets,” the man says. “They’re back by the feeder goldfish.”
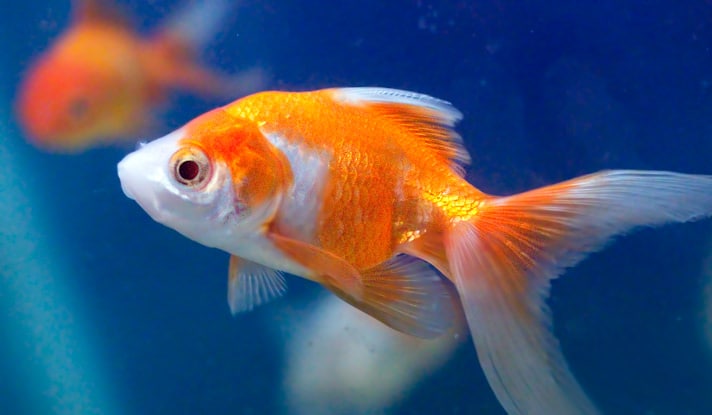
Well, pond comets were not what you meant, but you might as well check them out anyway. Sure enough, they are goldfish.
At your next stop—an aquarium store 30 miles away—you have better luck. They know what koi are, but they don’t stock them as a regular item. No problem, however, they can be special ordered. Unfortunately, they cannot tell you much about what the fish will look like, except that they usually get some pretty red, black and white ones. So much for selecting that beautiful gin-rin kohaku you saw in the book.
You try one last place and you’re in luck—they have an aquarium filled with koi. But when you see them, you can’t believe your eyes. These are nothing like the pictures you have been ogling for months. In fact, these things are pretty plain—if not downright ugly. You are beginning to wonder why you spent four weekends putting in a backyard pond.
Don’t despair. There is an alternative: shopping for koi by mail.
Air shipping of live fish is now a well-developed art. Having received hundreds of koi from suppliers around the country, and even having brought a good many back from Japan myself, I have never lost a fish in transit. So acquiring them is the least of your problems (more on that later)—choosing and paying for them, however, is another story.
Koi Quality
The reason to consider koi by mail is quality. Almost any aquarium store can get you good, pond-quality koi, and they are terrific fish at reasonable prices. But should you want to make the jump to animals that might successfully compete in koi competitions—so-called show-quality koi—you need to turn to dealers and breeders (including hobbyists) who work exclusively with koi.
What is a good-quality koi? Judgements about “quality” are probably more closely defined and hotly debated for koi than for any other ornamental fish. This is due to the intense competition that takes place at innumerable koi shows around the world each year. These koi represent the very best and have prices to prove it.
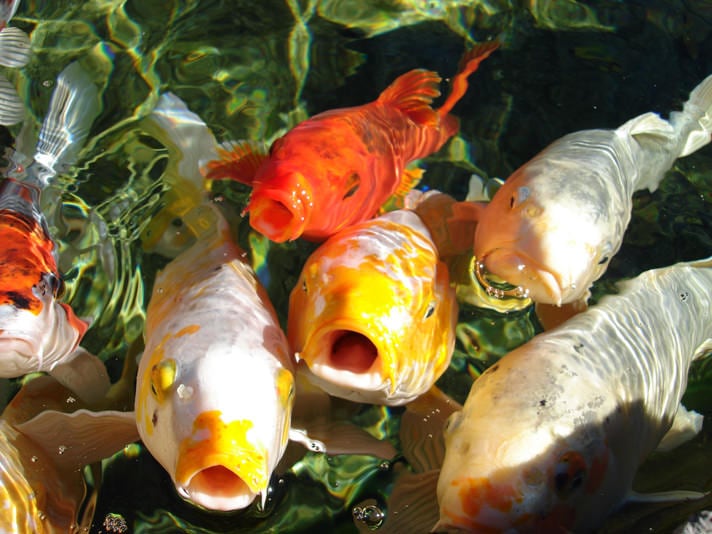
As I have already suggested, at one end of the spectrum there are pond-quality koi. These are basically healthy animals without any remarkable color characteristics. They are certainly colorful, lively and wonderful—but they will not catch the attention of seasoned koi show judges. Typically, pond-quality koi cost $10 to $100 depending on size.
At the other end of the spectrum are show-quality koi. The best are breeder certified, meaning they have fairly stable bloodlines (genes) that offer some certainty of passing on their primary color characteristics. These fish can easily cost $10,000 and up. A good breeding koi pair may run ten times this amount.
In between there are various good-quality fish that may be considered show quality in some ways but not in others. Prices vary considerably. There is an inherent level of uncertainty as well. Koi may change coloring and patterns over time. A young show-quality fish may not mature into anything noteworthy. A baby pond-quality koi may unexpectedly blossom into a mature champion. Speculating on how a given fish might “improve” in quality and value over time is a very risky proposition. Of course, many koi clubs—local, national and international—have devised very detailed judging standards. Most of the basic criteria can be found in the popular books on the subject and in KOI USA, the magazine of the Associated Koi Clubs of America. Joining a koi club and speaking with “old-hands” at judging is the best way to learn the details.
My idea of a good-quality fish is simple. First, it has all its parts: eyes, fins, scales and so on. Second, it has a nice conforming shape. That is, it should not be thin like a knife nor should it have a hollow or humped back. In well-kept animals, the body should be broader than the head. Any good book on koi will include a discussion on body type.
At this point, with my two basic concerns satisfied, I am personally happy with the koi. But for most koi keepers—especially breeders and show aficionados—koi quality is much more than this. Therefore, a third consideration is that the fish should have clear defined colors in crisp patterns. That is, the reds are red, the whites are white, black is black and so on. The edges between different colors should be sharply defined. One’s own perceptions of color quality evolve dramatically after attending a few koi shows. It is something you have to see repeatedly—descriptions and photos do not help much.
The fourth and final consideration is a quality to which I am partial. It is “imposing presence.” This is the emotional effect that the fish has on the observer. How the fish moves, its shape and its attitude in the water combine to give presence. Looking at koi in a backyard pond, you will know it when you see it.
What I have just described is still in the domain of pond-quality koi. You have to be a bit discriminating in your selecting, but such fish can be found and they are affordable. Admittedly, they will never win a contest, but that is not why I keep them anyway.
In the end, koi quality depends on many subjective judgements and on money. In this respect, I very strongly advise first-time backyard pond owners to begin with pond-quality koi. No matter what your experience with aquariums, raising pond fish outdoors is different. Ask yourself what your reaction would be if you woke up the next morning to find the $800 koi you just bought drying on the deck near your backyard pond (yes, koi do jump).
Only after you have several years of backyard pond experience would I recommend consideration of the more expensive animals. But given the longevity of these fish—many decades and longer—raising some magnificent specimens can truly be a wonderful experience.
Do a Little Research
When it comes to finding really nice koi, ordering by mail offers excellent possibilities. However, you can come away from a mail-order koi transaction either happy or angry. It all depends on the amount of time you spend doing a little preliminary research before the purchase.
Usually, in the case of mail-order koi, the decision about quality is a function of price and availability rather than personal taste. The more you are willing to pay per fish, the higher the “quality”—at least in the opinion of the dealer who is selecting the fish for you.
It is also true that certain varieties of koi are more expensive than others. A high-quality 6-inch (a white fish with large red patches) may cost $3000. A high-quality oghon (basically a golden, metallic-colored fish) of the same size may cost $100. These vast differences in price reflect the ease or difficulty of breeding for specific traits, the overall desirability of the variety to koi keepers and the availability of the variety being sought.
In the world of koi dealers, Japanese terminology is the language of choice. Telling a dealer you want a white fish with black markings will not get you very far. So, before calling a koi dealer, sit down with several good koi reference books and some back issues of KOI USA. These have numerous pictures of the many different types of koi varieties along with the proper Japanese names. As you glance at the photos, make note of the ones you are most interested in. Keep in mind, however, that the pictures you are looking at are probably grand champion koi from the most prestigious Japanese koi shows. You will not be ordering those specific fish—unless you have decided to forego buying that new Porsche you’ve been looking at. Also be aware that many of the varieties you see in the books are fairly hard to come by. The basic kohaku, showa, sanke, oghon, shusui and utsuri are usually available. Others may require a special search, which can often be costly.
Calling the Koi Dealer
When you have decided on the selection of koi varieties that interest you the most, you can call a dealer. These days there are many fine, reputable koi dealers around.
Read the list of varieties you are interested in to the dealer and refer explicitly to the books you are using and the corresponding page numbers. Most koi dealers have these texts readily available, and it will save some confusion if both of you are looking at the same pictures.
Next will come the discussion about size and quality, and you will quickly discover why I have mentioned price so frequently. If you are used to buying tropical fish, goldfish or even saltwater fish, you will be in for sticker shock. What generally passes as good-quality koi cost money. And the price is determined by what the market will bear.
If you are considering individual fish in the price range of several hundred dollars each, you should insist on seeing photographs before you buy. Koi dealers will provide you with Polaroids showing the specific fish and their prices—if they are convinced you are serious. When the photos arrive, you can look them over, select the fish you want and then call the dealer to finish the purchase. I strongly advise anyone who is considering buying expensive fish to insist on seeing pictures of the actual animals first. But don’t expect such service for inexpensive koi.
Frequently it is possible to get a discount if you order a number of high-quality fish at the same time. The discounts can be significant—30 percent or more—depending on the specifics of your order, the season and the business climate, as well as other factors. Once the dealer knows you are serious he will be willing to bargain with you.
Lastly, most dealers will guarantee live delivery, but that is it. They have no control over what you do with the fish once they reach the destination point. I have never known a koi dealer who would not replace an animal if the death occurred in shipment. In any case, you should discuss this before the deal is closed.
The Subtleties of Shipping
Once you have finalized the deal, you will have to arrange for shipping. There are two aspects to consider: how the fish will be packaged and how they will be delivered.
No koi dealer is interested in delivering dead fish. They have all developed specific procedures through experience that work best. Your main concern is to know what those procedures are.
First, find out the pH of the dealer’s water supply. This is not important for shipping purposes, but it will affect how the animals acclimate to their new setting once they arrive. Most fish can tolerate small changes in pH—usually around 0.2 unit per day. A fish kept in water with a pH of 7.2 can be moved easily to water with a pH between 7.0 and 7.4.
But if the difference is much greater, the fish’s own internal chemistry begins to fluctuate and the animal becomes ill. The fish may become listless or it may dart around the backyard pond or aquarium in an agitated manner. It may also appear to cough and spit up fish food. pH shock—the effects of exposing a fish to very great differences in pH—will kill the fish in 48 hours.
Consequently, the pH of your quarantine aquarium for the newly arriving koi should match as closely as possible the pH of the fish’s original backyard pond water (not the water in the shipping bag). If your local water has a pH that is very different,
you will need to alter and stabilize the pH of the quarantine aquarium prior to the arrival of the new fish (see the sidebar to the right). Once the fish are in quarantine, you will have a chance to acclimate them to your local water conditions.
Next, you want to know what water additives will be used in the shipping bag. Water conditioners and ammonia neutralizers are a good idea. Some water conditioners contain chemicals that supplement the fish’s natural slime coat, providing added protection during shipping. Others possess chemical buffers that help stabilize the water quality.
An ammonia neutralizer will, of course, prevent harmful ammonia build-up that can occur in the shipping bag. I consider the use of an ammonia neutralizer an absolute must.
You also want to know if the water will contain salt. Salting the shipping water—usually around 0.5 to 1 gram per liter (up to a tablespoon per gallon)—can be very helpful in minimizing stress during transport. Where freshwater contains only a negligible salt concentration, the average freshwater fish has a body salt concentration of around 1 percent. As the result of osmotic forces, freshwater is continuously flooding into the fish, and because of this, freshwater fish never have to drink water. Instead, they have to use a tremendous amount of energy expelling water from their bodies. Raising the salt content of the shipping water lowers the osmotic gradient between the fish and the water, and therefore the fish can use less energy to keep itself internally “dry.” The fish arrives in stronger condition because of this.
Salting the water also aides a fish that is wounded in transport. The fish’s skin and membranes act as barriers that keep precious minerals and salts in the fish from escaping into the less-salty surrounding water. If physical injury occurs, breaking the barrier, these critical chemicals are lost to the water. The result is extreme disruption of the animal’s internal chemistry, osmotic shock and death.
Salting the water minimizes the outflow of minerals and salts from the fish should physical injury occur. It makes it easier for the fish to cope with the external damage and to repair it. This significantly increases the chances of the fish surviving all the handling involved in shipping.
Next, will antibiotics or parasiticides be used? This is always a bad idea. Shipping fish in these drugs serves no useful purpose if the animals are in good condition. But it can be harmful. Exposure for 24 hours to antibiotics or parasiticides kills very few pathogens but does help to create resistant strains, which are much harder for you to control later. If treatment for some problem is required, it should be completed well before the fish are shipped.
Will oxygen be used, rather than air, in the shipping bag? Using pure oxygen is really essential. If you are transporting fish for a few hours or less, ordinary air—which is only 21-percent oxygen—in a large shipping bag will suffice. But for air freight shipping, pure oxygen is the only way to assure that the animals do not arrive asphyxiated (air shipments do occasionally get misplaced or misdirected.)
Finally, will tranquilizers be used? Generally, this is not necessary and is a bad idea. But for longer intercontinental flights some dealers believe that this procedure may lower the risk of the fish exhausting all the available oxygen in the bag. (I have brought koi home from Japan on trips lasting 24 hours, without the use of tranquilizers, and the fish have always been in fine condition.)
You should insist that the fish be double-bagged for shipment. Knots untie, rubber bands snap and plastic leaks. Double bagging provides some insurance that your fish will arrive still swimming in water.
If at all possible, try to arrange for door-to-door overnight delivery. This is the least nerve-wracking, most reliable delivery method. It is also the most expensive. But assuming you have just laid out $800 for fish, why haggle over another $50? Unfortunately, many overnight delivery services will not take live fish. It pays, however, to check around—some make exceptions.
The alternative is air freight, which involves going to the airport yourself to pick up the fish. This is the most common means of delivery for mail-order koi.
No matter what prior arrangements are agreed upon, make sure that the dealer calls you after the box has been loaded on the plane and that he gives you the flight number, parcel number, time of departure and time of arrival. Although air freight can be delivered, you don’t want to keep the fish in transport for yet another day, nor have the boxes bouncing around in the back of a truck, particularly on very hot or cold days.
Getting Ready
Whether the fish are being delivered to your home or are waiting for you at the airport, once the fish arrive they are your responsibility. There are a number of steps you can take to minimize the risks of losing one or more of your new koi.
First, irrespective of whether your backyard pond is new or established, the fish should be quarantined in a separate aquarium for at least two weeks—I strongly advise a four-week quarantine period. The holding aquarium can be any temporary enclosure that is biologically filtered (see sidebar to the right).
Although this sounds like a big pain in the neck—and it is—it will save you unimaginable grief in the long run. The quarantine period will allow you to study the new arrivals in detail over a period of time and to reliably and effectively treat any diseases or parasites they may be harboring. Equally important, this procedure will also prevent the introduction of parasites into your backyard pond.
As already noted above, the pH of the quarantine aquarium water should match the pH of the dealer’s backyard pond water as closely as possible. You will be able to slowly acclimate the new fish to your local pH while they are in quarantine.
The backyard pond where your new fish will eventually live should have completed the initial nitrogen (ammonia) cycle before they are added. If the backyard pond is already established, this will not be a problem. If it is a new pond, it should be cycled before you even order the fish. I suggest you use ordinary clear (unscented, non-detergent) household ammonia to initiate the nitrogen cycle.
Start by adding about 20 ounces of ammonia for every 250 gallons of pond water. Stir the water, wait an hour or two and then conduct an ammonia test. It should read somewhere between 1 and 2 parts per million (ppm). As long as the reading is greater than 1 ppm, the nitrogen cycle will start.
Test the water each day and add ammonia to keep the concentration above 1 ppm. Test for nitrite (not nitrate) on day 15, assuming the water temperature is near 70 degrees Fahrenheit—if it is cooler, wait a few days longer. Nitrite readings should start to go up and ammonia readings should start to drop. After anywhere from 30 to 60 days the nitrite level should be close to zero. At this point your backyard pond is safe for the koi.
Life In a Shipping Bag
Before we discuss the details of taking delivery of your koi, let’s consider life in a shipping bag. This background will help you to understand the reasoning behind the procedures I suggest.
A shipping bag is truly a closed environment. Once the bag is sealed, whatever happens in the bag stays in the bag. Basically, this is bad news for the fish.
First, and foremost, a fish releases a significant amount of ammonia into the water through its gills. Fish urine adds to this ammonia load. Normally this would kill the fish, except for two things: 1) an ammonia neutralizer will render the ammonia harmless and 2) the shipping water tends to acidify (the pH drops) in transit, converting free ammonia to less toxic ionized ammonia.
Acidification takes place as a result of fish respiration and excretion. As the fish breathes, it takes in oxygen from the water and then exhales carbon dioxide into the water. Some of the oxygen from the atmosphere in the bag diffuses into the water and some of the carbon dioxide in the water diffuses into the air. But some of the carbon dioxide remains dissolved in the water, forming a weak carbonic acid. This brief drop in pH protects the fish temporarily from ammonia poisoning. At the same time, the change is sufficiently slow and temporary that pH shock is not a problem—providing the fish is acclimated properly on arrival at its destination.
The longer the shipping time, the greater the amount of carbon dioxide that replaces oxygen. As this happens, the bag will deflate. This is because the pressure produced by the carbon dioxide in the bag is less than that originally produced by the all-oxygen atmosphere. As the carbon dioxide level continues to rise, the fish will become mildly asphyxiated. They will become drunk and sleepy, and eventually fall unconscious. (This also makes me question whether tranquilizers are really necessary).
Taking Delivery
In taking delivery of your fish, it pays to prepare for the possibility that something has gone wrong during shipping. The equipment requirements are simple but essential. My recommended “supply list” is shown in the sidebar to the right.
Bringing your own tub and water is a must. The water should be prepared before departure. It should come from your quarantine aquarium, thus ensuring that the pH matches the dealer’s water and that the transfer to the quarantine aquarium is stress-free. For all the reasons explained earlier, the tub water should be prepared with water conditioner, ammonia neutralizer and salt (1 tablespoon per 4 gallons). Do not take shortcuts.
The one tricky item on my list is the air pump. Some battery-powered units are available on the market. Alternatively, you can just as easily use a standard tire inflating pump that plugs into the cigarette lighter in your car. You can pick up an accessory pin at any sporting goods store (used to inflate basketballs, etc.) that will fit in the air hose valve and allow you to attach air line tubing and an airstone. (The drawback of a tire pump is that it is incredibly noisy.)
On the assumption that you are picking the fish up at the airport, you should immediately check the condition of the animals when you are handed the box at the air delivery office. Despite the clearest of stickers, the boxes are sometimes left out in the cold or in the sun. Carry the box over to a dark corner of the room to avoid opening it in bright light and shocking the fish in the process. Carefully open the top—using a knife is not a good idea because you might puncture the plastic bags inside.
Check for leaks. The interior of the box should be dry. The fish should be swimming in bags that are filled one-third to one-half with water and the remainder with oxygen. Usually, the water level extends just above the dorsal fin. If the bag has leaked and is completely empty, do not despair—the fish may still be alive. Immediately put them into the plastic tub with the prepared water you brought along. Add several drops of fresh hydrogen peroxide per gallon and then wait several minutes. Hydrogen peroxide is basically a water molecule with an extra oxygen atom attached. When you put a few drops in water, it releases the oxygen and immediately boosts the dissolved oxygen level. Do not make the mistake of believing that if a few drops are good, many drops are better. Adding too much hydrogen peroxide to the water will kill your fish.
If the fish do not seem to respond to this, you might also want to try fish resuscitation. Wet your hands and hold the fish loosely around the abdomen. Using your index finger, press lightly underneath the fish directly below the gills. You will notice that the animal’s mouth opens and the gills flare. Now move the fish slowly through the water. Continue this for 10 minutes. It works well on stunned, asphyxiated and unconscious fish. It does not, however, bring back the dead. If the fish do not revive, you have the air freight agent as a witness that they arrived dead.
If there are no leaks the fish should be swimming around. Any fish lying on its side or floating is, for all intents and purposes, dead. You can attempt to resuscitate the fish if its eyes are not glazed over and cloudy. Make sure the air freight agent certifies any dead fish. If there are any problems with the fish, call the dealer immediately from the freight office.
Once you get the fish out to your car you should note the inflation level of the bags. The bags should be puffed up like balloons and the bag surface should be taut and firm. This indicates that there is still plenty of usable oxygen in the bag. Again, all the fish should be swimming actively. If this is the case, close the box and drive home.
If, however, the bag is only partially inflated—or the fish are barely moving—it means that the oxygen is running out. You will need to take action. Open the bag and pour the fish and shipping water into the tub with the prepared water. Stir the water gently to allow the ammonia neutralizer to mix. Next, set up the air pump and airstone to bubble air into the tub water, agitating the surface of the water. If you are picking up many fish, or especially large fish, you will need more than one tub.
What you don’t want to do is just plunk the airstone into the shipping bag. The air bubbling through the shipping water would drive off the carbon dioxide, reducing the carbonic acid concentration and thereby raising the pH. If no ammonia neutralizer was used or if it was exhausted, the ammonia in the water would suddenly become toxic as the pH rose, poisoning the fish.
The only other water-quality issue to be concerned with relates to temperature. The water temperature in the tub should be at least as warm or warmer than the water in the shipping bags. Thermal shock in koi is very common when the fish are moved from warmer water to cooler water. Moving koi from cool to warmer water does not seem to stress them as much. While it is always best to match temperatures as closely as possible, when this can’t be done, err on the high side.
Finally, add two or three drops of hydrogen peroxide—again, to increase the oxygen content of the water—and cover the tub tightly. With everything securely packed in the car, head home.
Regardless of whether you picked your fish up at the air freight office and brought them home or they were delivered directly to your door, the procedures from this point on are the same. You should have one or more “receiving tubs” ready. Put just enough water in the tub to submerge the dorsal fin of the fish. Again, make sure that the water is at least as warm as the water in the shipping bag. Do not match the pH of the water in the shipping bag—it is highly acidic and not the correct water source to match. Rather, the pH of your tub water should match as closely as possible the pH of the water in which the fish was originally kept.
Add water conditioner, ammonia neutralizer, a tablespoon of salt for every 4 gallons of water and set up the air pump to circulate the water and agitate the water surface. Empty the shipping bag—fish and water—into the tub. Let the fish swim into the tub—don’t lift them with a net.
Cover the tub and leave the fish alone. About an hour or so later double the amount of water in the tub and add an appropriate dose of water conditioner and ammonia neutralizer. After another hour has passed you can transfer the fish to your quarantine aquarium. When transferring koi, do not lift them out of the water with a net. Guide them into a shallow pan or tub containing just enough water to cover their back. Then move them to the quarantine aquarium and submerge the transfer pan so they can swim into the aquarium. Be warned: koi can and do jump.
The quarantine aquarium should remain covered at all times. Koi occasionally like to go on out-of-water adventures.
Once the fish are safely in the quarantine aquarium, most of the worrying and work are over. Maintain good water quality by ensuring adequate mechanical and biological filtration, as well as proper aeration. You should test the pH, ammonia and nitrite levels daily.
I strongly recommend changing at least 10 percent of the water each day (remember to add salt to the replacement water). This is when and where you will acclimate the koi to your local water supply. As you change water, do not try to alter its pH. Slowly, over the course of the quarantine period, the fish will adjust.
You should spend five minutes or more several times each day watching your new arrivals in the quarantine aquarium. Give them a couple of days to settle down and then observe their behavior. Look for signs of problems—disinterest in koi food, off-balance swimming. Watch closely for signs of wounds or parasites—raised bumps, white or grey patches, blackened fin edges and so on. There is no better time to play fish doctor. If you do discover a problem, then treat all the fish together. This is especially important with parasites, because some fish may not show any outward signs of being infested.
When the quarantine period is over—a minimum of two weeks—move the fish to the backyard pond. You have done everything possible to ensure that your new koi will make a smooth transition to their new home.
I hope I have convinced you that there is no need to feel limited to the selection of koi in your local area. Most of us are not lucky enough to live near koi dealers and breeders. Obtaining high-quality koi (or goldfish) from distant dealers and breeders can be an exciting and rewarding experience.
Posted by: Chewy Editorial
Feature image: Via Mark Doliner/Flickr
Share:
